
Planting palm trees doesn’t differ significantly from planting other types of trees. Nursery-grown palms typically come in pots, balled, or burlapped at the root. Try to plant your palm tree shortly after purchasing it.
If there will be a delay between purchase and planting, ensure that the root ball remains moist but not soaked. Palm trees cannot thrive in pots indefinitely.
Typically, a palm can grow in a pot for two or three years. Beyond that, it needs to be either planted in the ground or repotted into a larger container with fresh soil.
Selecting the Right Palm
Before getting into the actual steps, let’s discuss the crucial step of palm selection, as this greatly influences the success of planting. When choosing a palm for your garden, you must ensure that you provide the right environment for it to flourish.
Different palm species have varying preferences for environmental conditions, so consider factors such as cold tolerance, light requirements, water needs, growth rate, and soil type.
- Cold Tolerance: Begin by determining your Hardiness Zone. Is your location warm enough for the palm you’ve chosen? While most palms thrive in warm climates within USDA Zones 9-11, some species can withstand colder temperatures, down to Zone 8 or even Zone 7.
- Light Requirements: Light plays a crucial role. If your chosen spot is shaded, it’s not suitable for a palm that requires full sun.
- Water Requirements: Depending on your palm’s water needs, consider its placement. Palms preferring wet conditions should be planted nearer to sprinklers or in low-lying areas.
For palms that thrive in drier conditions, a spot on a hill may be more suitable. It’s also wise to plant them alongside other plants with similar water requirements to ensure uniform watering. - Space: Ensure the palm has ample room to grow. Measure the area to confirm that the palm won’t be crowded by structures or other plants. If there are overhead utility wires, avoid planting tall trees in that vicinity.
- Soil: Assess your soil type, whether it’s sandy or clayey. Regardless of soil type, good drainage is essential.
Transporting The Palm
Take great care when transporting and handling palm trees, as their fragile bark is easily damaged. Any harm to the bark can leave the tree susceptible to insects and fungus.
Additionally, the heart of the palm, the area from which all the leaves grow, is quite delicate. Excessive shaking during transportation from the nursery can cause this heart to crack or shatter.
The consequences of such damage may not become apparent for days or even weeks, and it could ultimately lead to the palm’s deterioration.
When Is the Best Time to Plant a Palm
The ideal time for planting a palm tree varies depending on your location. For instance, in South Florida, you can plant palm trees all year round. However, it’s advisable to avoid planting during the extremely hot months, as ensuring adequate watering for newly planted palms can be challenging.
If you reside in an area where temperatures can drop near freezing or below, it’s best to plant during the warmer months, from spring through fall.
Newly planted palms are more vulnerable to low temperatures, so allowing them ample time to establish themselves before the onset of cold weather is essential.
Some palm enthusiasts argue that planting palms in cold weather allows the roots more time to develop before the rapid growth of spring. However, this approach’s success largely depends on the specific area and type of palm tree in question.
Certain palm species are hardier, while others are more delicate. Given the investment in your palm tree, it’s generally advisable not to take unnecessary risks.
By the way, it’s worth noting that planting the palm later in the day when it’s cooler can be beneficial. This gives the tree the entire night to recover from transplant shock and replenish the moisture it lost during the transplanting process.
Why It’s Important to Acclimatize a Palm Before Planting
Another crucial step before planting your palm is acclimatization. If you’ve purchased a palm tree from a greenhouse or a shaded environment, it’s not accustomed to full sun exposure.
Palm trees that thrive in partial shade can adapt well to a shady spot, but what should you do if your palm tree requires full sun? Planting it directly in full sun can lead to sunburn.
Even if the palm was previously growing in full sun, the sunlight in your area might be hotter and brighter. You need to gradually acclimatize your palm tree to higher levels of sunlight. This process typically takes about four to six weeks and can be accomplished in two ways:
- Place it in a pot (if it’s not already in one) and position it in a shady outdoor spot. Increase the light exposure slightly every week until your palm tree becomes accustomed to full sun. Afterward, you can safely plant it in full sun.
- Plant your palm in a location with full sun and cover it with a plastic sheet or cover. Place four stakes in the ground and secure the plastic cover on top. Every few weeks, puncture holes in the cover to gradually expose your palm tree to more sunlight.
It’s essential to acclimatize your palm tree slowly because it is already in shock after transplanting, and subjecting it to excessive sunlight can add unnecessary stress.
Improving Drainage Before Planting a Palm
Having proper drainage is absolutely essential for the healthy growth of a palm tree. Therefore, it’s crucial to understand how water behaves when you irrigate the plant or during rainfall, which largely depends on your soil type. Sandy soil typically has better drainage than clay soil.
You can perform a simple drainage test by digging a small hole about 15 inches deep and filling it with water. Wait for the water to dissipate, then fill it again.
If the water drains away in about two hours, you have excellent drainage. If it takes up to 12 hours, your drainage is acceptable. However, if the water remains in the hole for several days, there’s a problem.
In such a case, it’s necessary to address the drainage issue before planting a palm tree in that location. Otherwise, stagnant water can lead to root rot and ultimately cause the death of your plant. Here are a few things you can do:
- You can drill holes to break up the clay soil and enhance drainage.
- Place some rocks at the base of the hole.
- Install a pipe that redirects water away from the plant.
Preparing Soil Before Planting a Palm

To amend, or not to amend, that is the question… After you dig a hole for your palm, and place the palm inside, you have the choice to backfill with the native soil or to blend that soil with sand and other materials to enhance drainage.
Soil amendments have sparked many discussions among gardeners. Some believe that amending the soil improves drainage and facilitates root development, while others argue it offers limited benefits and could lead to issues down the road.
Numerous universities have conducted studies on this topic, and they’ve generally concluded that it’s better for palms to grow in their native soil. Otherwise, the plant’s roots tend to confine themselves within the amended soil and avoid venturing into the surrounding earth, essentially treating the planting hole like a container that restricts growth.
While I agree that the palm roots will eventually have to get used to the soil of your garden, I also think that mixing it together with organic soil mix will minimize the transplant shock. So, yes, I personally prefer amending the soil. Here is the ratio I recommend:
- Lava rock Soil: For lava rock soil, consider a finer grade of lava cinders as backfill. You can add one part of organic matter to three parts of your native soil.
- Sandy Soil: If you have sandy soil, the same ratio applies: one part of organic matter to three parts of your native soil.
- Limestone Rock Soil: In the case of limestone rock soil, #12 grit coarse sand works well. Add one part of sand to three parts of your native soil.
- Clay Soil: When dealing with clay soil, break up large clods to loosen it as much as possible. Then, add one part of coarse sand and one part of organic matter to three parts of the native soil.
Speaking of organic matter, you can use locally available materials like cedar bark, aged leaf matter, bark mulch, ground bark, sawdust, aged lawn cuttings, and more.
By the way, the best soil mix is based on Canadian peat moss. I use Sphagnum Peat Moss to ensure my soil has excellent drainage.
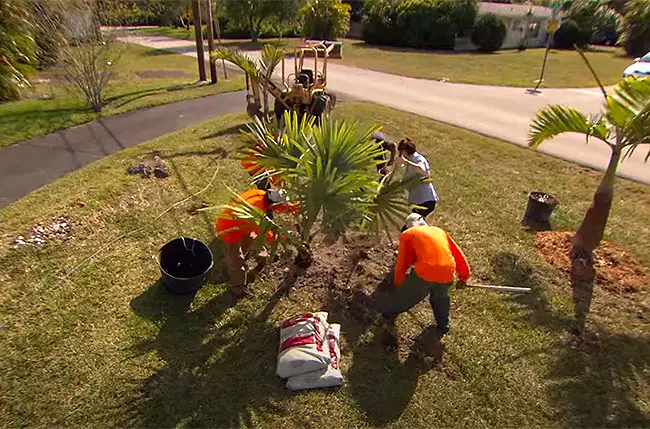
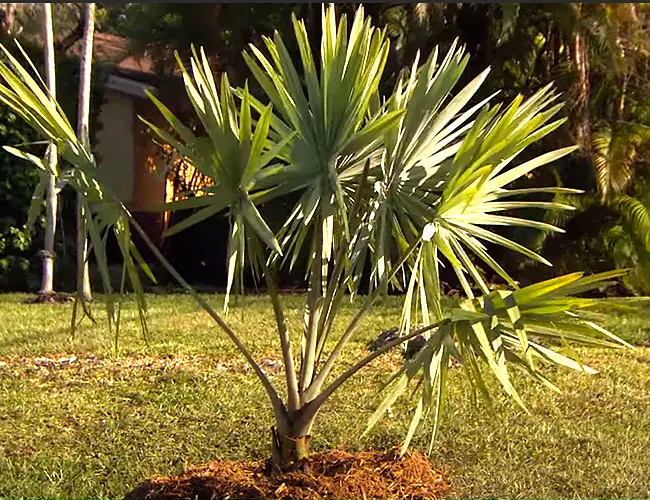
Palm Tree Planting Step-By-Step
By this point, you’ve selected a palm and determined its location. You’ve also assessed drainage, decided on the soil mix, and acclimatized the tree. Now it’s time to plant it.
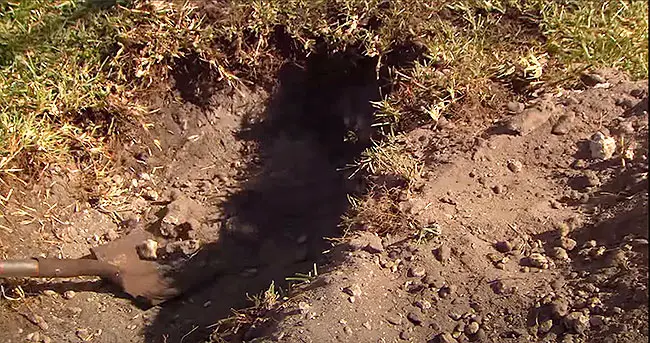
Step 1: Dig a Hole
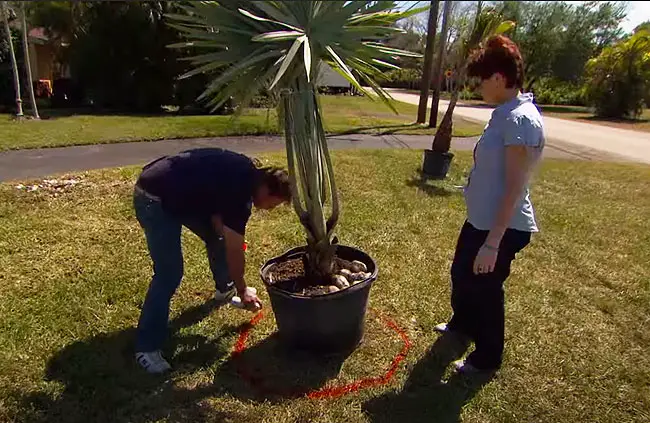
Begin by digging a hole wide enough to comfortably accommodate the root ball of the palm tree, leaving ample space on all sides. Making it approximately twice as wide as the root ball is a good idea.
The depth of the hole should match the level at which the palm tree was originally grown. Avoid planting it any deeper, as this could hinder root access to nutrients and water. If you plan to add a soil mix, dig the hole 6 inches deeper than required, keeping the extra soil for backfilling.
Step 2: Remove Palm From The Container
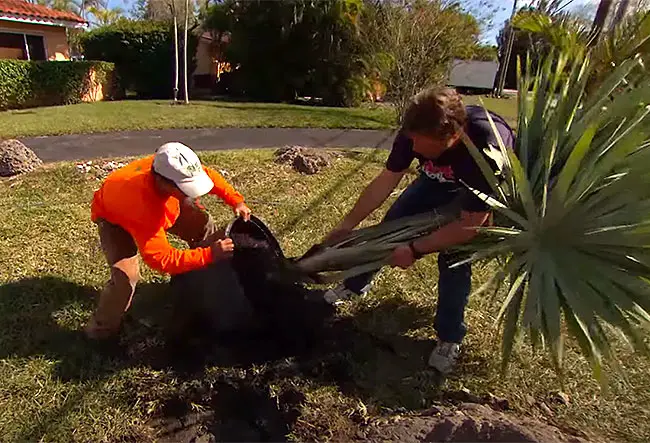
When removing the root ball from the container, take care to minimize root damage. Some palms are sensitive to root cutting or bending and can undergo severe shock.
With smaller trees, flip the container upside down and tap it until the root ball slides out. With the larger one, lay the plant down on the ground, slightly loosen the sides, and try sliding it out.
Alternatively, you may find it easier to cut the container away from the root ball and then pull it off.
Step 3: Select the Right Depth
Determining the appropriate planting depth is crucial. While some palm enthusiasts recommend planting a few inches deeper and creating a “water well,” this is not the best practice.
Palm trees should be planted at the same depth at which they were previously growing. Planting too deep can lead to root rot due to nutrient deficiencies and water stress, potentially causing long-term harm and eventual death.
On the other hand, planting the palm too high can also be problematic, making the tree unstable and susceptible to wind damage. Sometimes, the palm may have pushed up in its container, exposing the upper part of its roots.
When planting it in the ground, be sure to position it slightly lower, covering the roots with soil. This ensures stability and proper growth.
Step 4: Place Palm Into The Hole
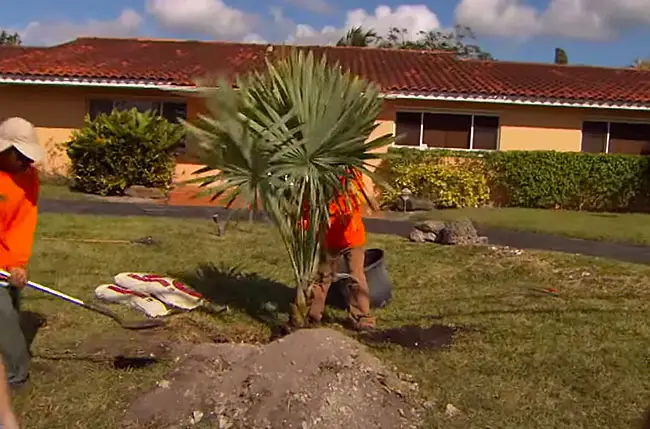
Begin by scoring the sides of the hole with a small shovel. This action loosens the soil, creating a pathway for the palm tree roots to navigate through the ground.
Backfill the hole with a portion of the soil mix you’ve prepared using the excavated soil and organic matter, then water it to compact the soil.
You don’t need to remove the soil surrounding the root ball. Leaving the existing soil around the roots reduces transplant shock. Some gardeners may assume that loosening the roots would aid the palm’s adjustment to the new soil, but this isn’t the case. Roots are susceptible to damage, so it’s best to leave them undisturbed.
Double-check the measurements of the root ball and the hole’s depth. Once the soil reaches the appropriate level, position the palm in the hole, ensuring it is centered and vertically straight.
Additionally, pay attention to the “front of the tree,” which is the side that has been exposed to the sun the most. It should face the sun when you plant it.
While some may believe that positioning the tree with the front side away from the sun for balance is a good idea, it’s not recommended. Exposing the back of the leaves to the sun can lead to sunburn.
Step 5: Add Soil Mix
Now that your tree is in the hole and correctly oriented, it’s time to add the soil. Fill the planting hole around the root ball with loose soil mix until it’s halfway filled, and then water it.
The loose soil facilitates root growth and expansion. Complete the backfill with more loose soil, taking care not to compact it.
Step 6: Build a Barrier And Water
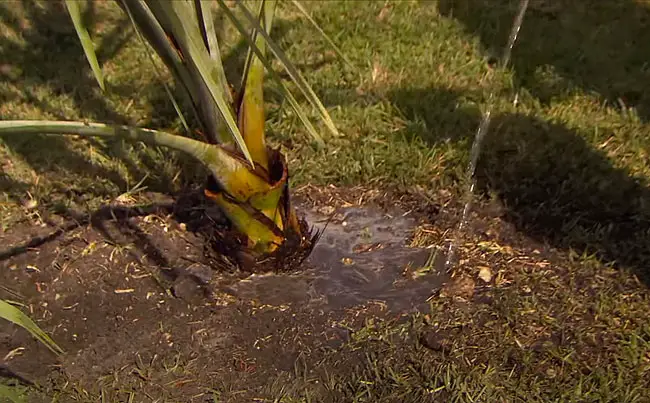
After planting the palm tree, the next step is to build a soil barrier around the hole’s perimeter. This barrier acts as a dam to retain water.
Thoroughly water the palm, ensuring there are no air pockets around the root ball. By this point, you’ve watered it three times – at the bottom, in the center, and on top – which should be sufficient.
Step 7: Add Mulch

Mulch serves as a protective layer that keeps the soil from drying out quickly and prevents weed growth. Apply approximately 2-3 inches of mulch around the newly planted tree.
Step 8: Brace Your Palm After Planting
Container-grown palms generally don’t require bracing, as their root balls are usually substantial enough to keep the palm upright. However, field-grown palms may have relatively small root balls in proportion to their height, making bracing necessary.
A tree brace typically consists of three wooden blocks with two adjustable straps designed to safeguard your new tree from wind and storm damage. You can acquire these braces at most home improvement stores.
- Position the braces around the tree’s bark. Three or four braces made from 2×4 lumber should provide ample support in the event of strong winds. Ensure they are long enough and spaced far enough apart to offer proper support.
- Wrap burlap around the trunk to protect it from damage, then secure an equal number of pieces of wood around the trunk using metal bands.
- Lastly, fasten the braces to the small pieces of wood. Avoid nailing directly into the trunk, as such wounds never heal and can create entry points for diseases and insects.
- Leave the brace in place for approximately one year.
Step 9: Make a Watering Schedule
Regular watering is crucial for newly planted Palm Trees. Preventing the soil from drying out is essential to the health and strength of your new palm.
During the first week, water it daily; for the second week, water every other day, and then you can transition to its regular watering schedule.
Deep watering technique is the most effective. This involves a slow trickle of water instead of a sudden deluge. Use a sprinkler or arrange a hose for a slow soak around the tree’s base.
You might be wondering, “How much water should I use?” As a general rule, the amount of water should be 10-20% of the container size for that particular palm. For example, if it’s a 10-gallon container palm tree, use 1-2 gallons of water.
Step 10: Fertilize Your Palm
It’s best not to fertilize newly planted palms until they produce a new spear, typically around two months after planting. Additionally, ensure that you fertilize only during the growing season.
Opt for a fertilizer with a continuous release formula that feeds your palm tree over several months, rather than a cheaper fertilizer that may wash away after a few rains.
One product I highly recommend is Jobe’s Palm Fertilizer. This product is exceptional because it promotes root development and the long-term vitality of all palm tree varieties. It won’t harm the roots and contains all the necessary nutrients for your palm trees.
Here Is a Great Video On How To Plant a Palm Tree
Note: In the video they did not amend the soil. Maybe they had a great drainage. They also did not water before planting the tree nor in the middle of planting that I recommend.
How Much Does It Cost to Have a Palm Tree Installed
If you prefer not to undertake the planting yourself, you have the option to hire a landscaping company. However, this service can be quite expensive.
The cost of planting a palm tree on your property can vary, but it generally ranges from around $200 for a 6-7 ft. 25-gallon container tree to about $500 for a 45-gallon container tree that’s 12-14 ft. tall.
Typically, this price includes labor, delivery, equipment, and supplies such as soil mix, mulch, and bracing materials. As you can see, having your palm tree planted by a professional can be a significant expense.
If you have a relatively small palm tree to plant, you might consider doing it yourself to save some money.
Related articles:
- Transplanting Palm Tree to a Bigger Container
- Top 10 Palm Tree Transplanting Mistakes
- Transplanting Palm Tree from One Location to Another
- Transplanting Palm Tree from a Container into the Ground
Mature palms. Expanding pool. Palms will have more earth beside them. Will that hurt them? How high can the soil be above the roots for a Royal Palm?
Thanks for the advice. Great article and very informative. I have just planted a 5 ft windmill Palm 2 days ago and I wish I had seen this article first. I did everything ok for the most part. Dug the appropriate side hole, cut the pot away from the Palm so not to disturb the roots. I prepped the hole with a organic soil and cactus mix along with some sand. The Palm was placed right away gently in the hole to minimize the light exposure on the roots. I filled it in with the same mix keeping it at the same depth that the pot was. The problem is I did it in full sun. Even though the roots were not exposed anymore than about 45 seconds it is in transplant shock and it does not like the sun. It’s lower fronds are getting brown tips which I’m sure is just the transplant shock but I covered it with a homemade burlap roof to block some of the sun. I’ll keep it on for a couple of weeks gradually increasing its exposure. I planted 3 small windmill palms in full sun back in the spring and they are dark green and growing so I’m hoping this is only temporary until it a acclimated. It is a beautiful tree though. Thanks for the article.
My aunt gave me a palm tree after her house foreclosed, I don’t know what kind & she doesn’t either. I don’t know the sun/shade it got at her house & she doesn’t either, go figure? It’s a fan palm & small right now, no idea how big it’s supposed to get. I planted in spot that is kinda shady because I assumed it was shady where she had it, from where we dug it up. Did good for a long while but then turned brown when summer got real hot. I thought not enough sun & not enough water so I just transplanted it to beside the creek in our backyard. Looks almost dying, still brown & fan stalks died & just pulled out of trunk. Trunk seems softer now :/ Suggestions?
I dug up the small seedlings and planted them in 1-2 qt pots. I put rocks on the bottom then peat moss and permliteI have 30 seedlings that have done well since moving to a pot. It is getting ready to turn cool (southern North Carolina) how do I care for the babies? do they need to come inside? these are windmill cold hardy plants. I am looking forward to watching them grow.
Can’t understand why the center limbs coming up are dead but the others are green . I planted it a year ago it’s a 7ft wind mill palm and I planted it in full sun as it was used to . I dug a 2ft deep hole and wide then I put tree in hole and put miracle grow potting soil around it then some soil from the hole with mulch around it . Is there something I did wrong if do plz let me know I like to save it . Ty
Thanks for your write up. Please what should be the spacing between palm trees if planted on a farm land