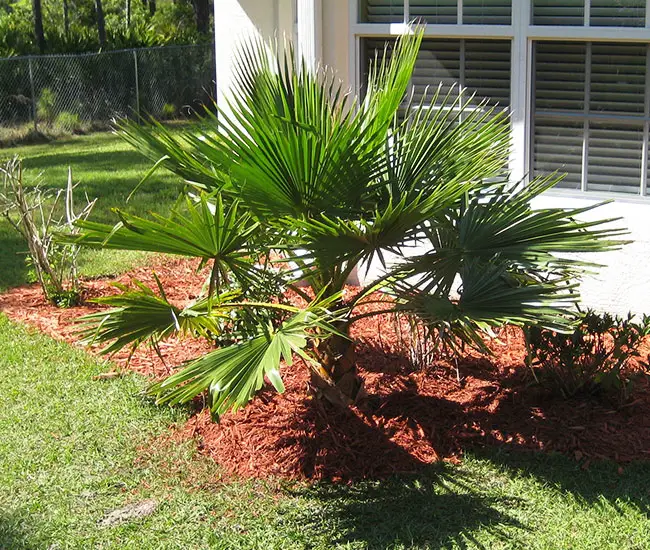
When palm trees have grown in a container for a few years, it’s time to transplant them into the ground. The best season for this transition is early spring, as roots tend to grow rapidly during the warm months. Try to perform the transplant later in the day when the temperature is not scorching hot.
Be prepared for your palm tree to experience what’s commonly referred to as “transplant shock.” This occurs because the roots are exposed to air, light, and new soil.
To minimize this shock, acclimate your palm tree by placing it in the new location a week before the actual transplant. This way, it can adjust to the new light levels and temperatures of the area.
1. Select the Location
Begin by choosing a suitable spot in your yard. A helpful visualization technique is to position the palm tree in its container at the intended location.
Consider the amount of sunlight that area receives; while some palms thrive in full sun, others prefer partial sun or shade.
2. Dig a Hole
The hole you dig should be approximately twice the diameter of the container.
3. Prepare Soil
Assess the type of soil in your garden. As palms thrive in well-draining soil, adding sand can greatly enhance drainage. Some palm enthusiasts opt to supplement the native soil with organic soil, while others rely solely on the native soil.
I concur that over time, the palm’s roots will naturally adapt to your garden’s soil, even if you initially mix in organic soil. However, I believe that blending them together during planting can minimize transplant shock.
For clay soil, use a mixture of three parts native soil, one part organic soil mix, and one part sand. If you have sandy soil, use a blend of three parts native soil and one part organic soil mix.
4. Remove the Palm from a Container
If you have a small palm, around 5 gallons in size, gently flip it upside down and tap the bottom of the pot. The palm should slide out easily. For larger palms, carefully place the container on its side and gently slide the root ball out of the pot.
If the palm is in a plastic container, it’s important to cut the container with scissors first to avoid damaging the root ball.
Over time, as the palm grows in the pot, its roots tend to wrap around the inside of the container. There’s no need to trim these roots. Try to plant your palm as soon as possible after removal.
5. Planting the Palm
When planting a palm tree, ensure that it is planted at the same depth it was previously growing. Planting it too deep can lead to root rot development due to nutrient deficiencies and water stress.
Some palms may suffer from root rot for many years and can die as a result. Begin by placing some soil mix into the hole and watering it. You don’t need to remove the soil around the root ball. Leaving the old soil around the roots will help reduce transplant shock.
Position the palm in the center of the hole and then backfill the hole with soil mix, ensuring there are no air pockets. If you don’t properly pack the soil, the root ball may sink into the hole over time, causing the palm to be planted too deeply in the ground.
6. Create a Soil Barrier
Build a soil barrier around the outside of the hole to create a dam that will retain water. Now, you’re ready to thoroughly water the palm. The goal is to ensure there is enough moisture around the roots to prevent them from hardening.
7. Water the Palm
For optimal results, deep watering is the way to go. Leave a water hose near the base of the palm with a slow, steady flow for about 20 minutes.
This ensures that the soil has enough time to fully absorb the water. In the first two weeks after planting a new palm, water it every two days. Gradually transition to your regular watering schedule after this initial period.
8. Fertilizing a Palm
Many websites may recommend fertilizing a palm right after planting, but it’s essential not to follow this advice. Give your palm ample time to acclimate to its new environment.
Apply a slow-release fertilizer only after you observe new growth, which typically occurs around two months after planting. Fertilizing the palm immediately after planting can introduce unnecessary stress, exacerbating transplant shock.
9. Provide Support
Tall palm trees should receive adequate support to prevent them from toppling over. Use 3-4 wooden blocks and adjustable straps to support the palm. Avoid the practice of nailing supporting blocks directly into the trunk. The support should be left in place for a duration of one year.
Related articles:
–Transplanting Palm Tree to a Bigger Container
–How To Plant A Palm Tree In 10 Easy Steps (with Pictures)
–Top 10 Palm Tree Planting Mistakes You Don’t Want To Make
–How To Move A Large Palm Without Killing It (with Pictures)

What is the name of the palm tree in the picture?
I like this article. I recently had a palm transplanted from my neighbor. I wasn’t sure about watering, i was always afraid of over watering. Are the prongs supposed to turn a light tan color? It always looks kind of dry.
Thanks for the advice. I did not know the best time to transplant is in the spring. And yes the leaves will turn a light tan when they usually start to grow new prongs.