Whether you’re relocating a palm tree within your yard or acquiring a field-grown palm tree from a nursery, the steps for planting remain consistent. Understanding how palm roots grow and respond to cutting is crucial to prevent damage and enhance the palm’s chances of survival.
In a nutshell, to successfully transplant a mature palm tree without endangering it, you should excavate it with minimal root disturbance, safely transport it to the new location, prepare the soil and planting area beforehand, and provide extra care for the palm after planting to reduce transplant shock.
It’s worth noting that the process can be more challenging for field-grown palms due to the greater root damage involved, in contrast to container-grown palms.
While the roots of container-grown palms may still be exposed to light and air during the move, they are not cut like those of field-grown palms.
Be prepared for your palm to experience what’s known as “transplant shock.” This occurs when a palm tree undergoes various stresses shortly after being transplanted, including adjustment to new soil, sunlight levels, temperatures, and potential water stress.
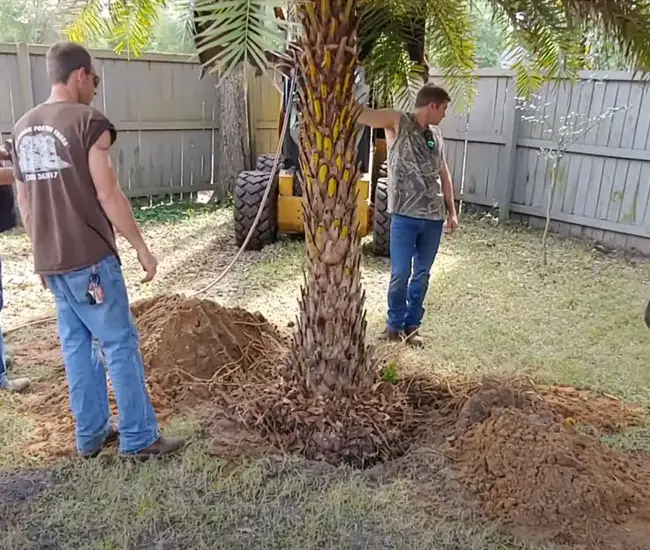
1. How Far to Dig Around the Palm Tree Root Ball
Palm trees differ from broadleaf trees in that they don’t possess woody roots. Instead, they have numerous small roots tightly clustered around the base of the trunk, resembling grass roots.
Unlike broadleaf trees, palm roots maintain their initial size and do not increase in diameter as they extend from the base of the palm. Palm roots tend to remain relatively shallow.
Research conducted by the University of Florida has shown that different palm species respond differently to root cutting.
For instance, in some palms like the Sabal palmetto, roots may die back after cutting and be replaced by new roots. As a result, the proximity to the palm’s base when cutting these roots may not be critical.
In the case of palms like the Coconut palm, approximately half of the cut roots are likely to survive and begin branching, regardless of the cut’s proximity to the base.
So, for these two palm species, you can keep the root ball relatively small when digging them out. However, for most palm species, the survival of existing roots is essential.
For palm trees under 15 feet tall, I recommend leaving a radius of at least 1-2 feet from the trunk. Since the root ball is three-dimensional, you’ll also need to dig down by 1-2 feet. However, please note that the specific root ball radius should correspond to the tree’s size.
If you’re unsure about how sensitive a particular palm species is to root cutting, it’s safer to leave more distance from the trunk.
Keep in mind that while a larger root ball reduces transplant shock and accelerates recovery, the added cost and weight involved may not always justify the effort.
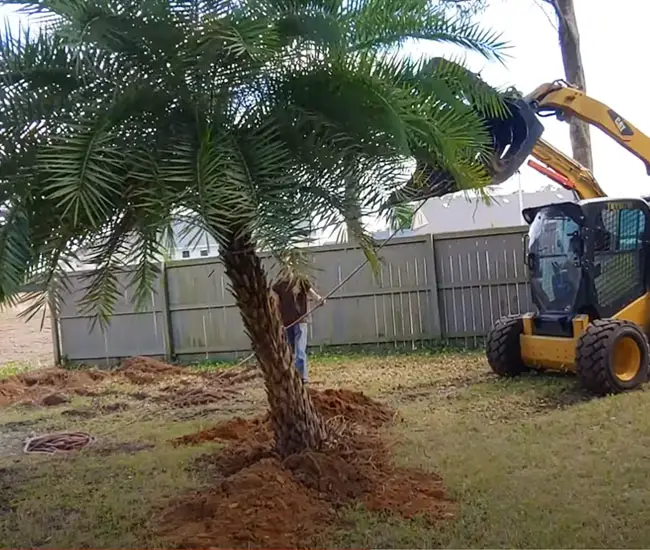
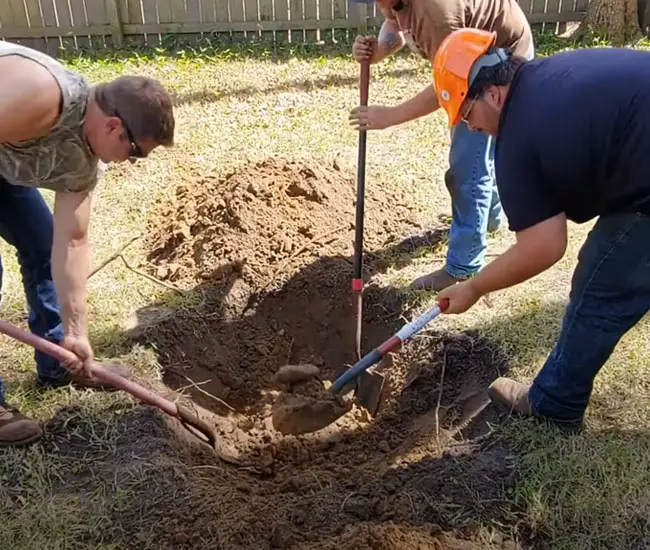
2. Digging Out the Palm
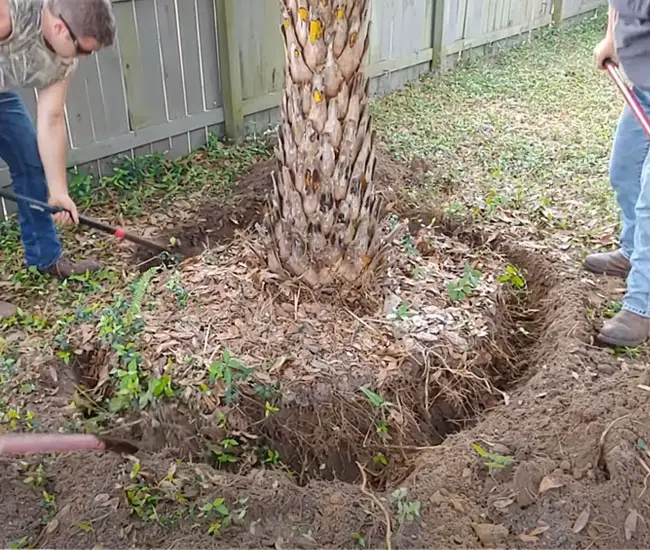
Now that you know how big of a radius to leave, start digging a trench around the palm. No matter how careful you are, some of the roots will be cut. Push the palm gently to tip it over and cut the rest of the roots.
Now that you’ve determined the appropriate radius, begin digging a trench around the palm. Even if you’re extremely careful, some roots will inevitably be cut. Gently tilt the palm over and proceed to cut any remaining roots.
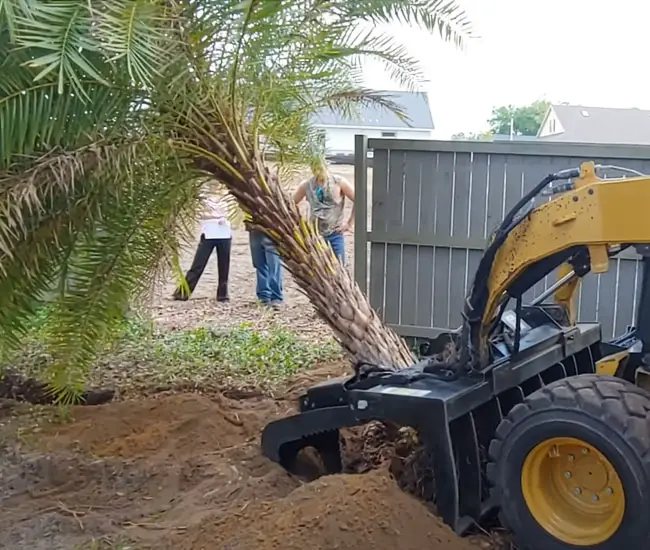
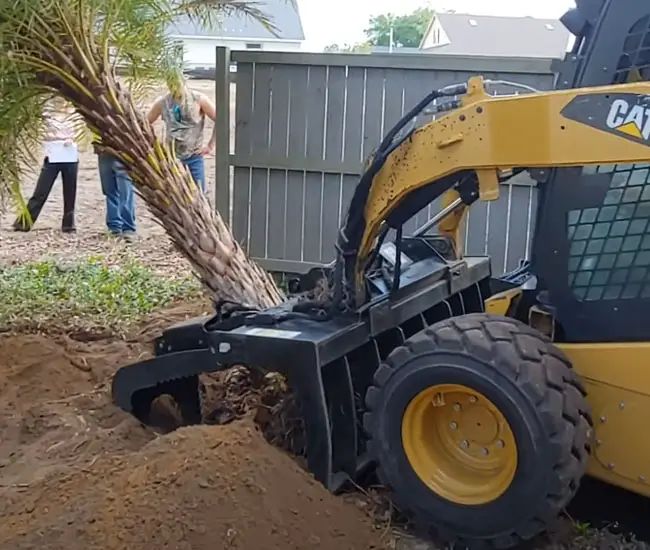
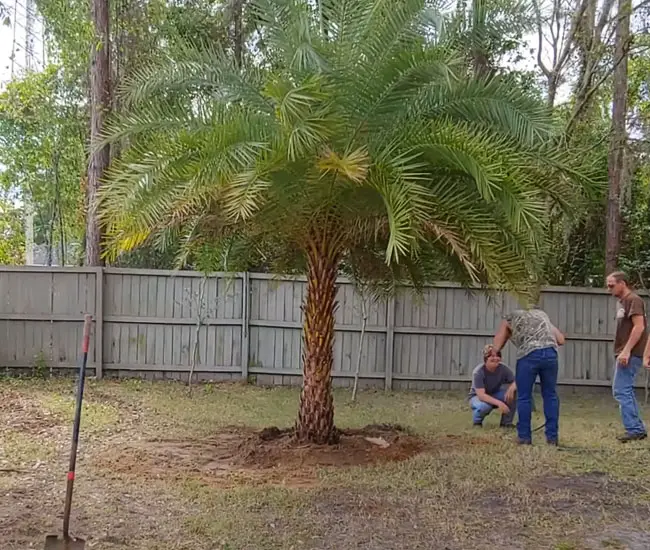
Depending on the palm’s size, you might need three to four people to lift it out of the hole. If the palm is larger than 30 gallons, you’ll require heavy machinery like a tractor or crane.
Palms can be remarkably heavy; for instance, a 20-foot tall palm can weigh around 1,000 pounds!
3. Removing Leaves
To reduce water stress in larger palms, many nurseries remove about ½ to ⅔ of the old palm leaves. Some even opt to remove all the leaves, but this choice can depend on the palm’s species.
For certain species like the Sabal palm, which loses all its roots during transplantation, a full leaf removal is the best bet for ensuring survival.
Based on both my personal experience and recent research, leaving some leaves on the palm significantly improves regrowth and survival rates.
If you’ve ever been to Florida during the spring, you’ve probably seen newly planted palms standing tall with a few leaves, resembling roosters.
4. Getting Ready for Transport
Before lifting the palm with a crane, it’s essential to tie together the remaining fronds to prevent damage to the leaves. Slimmer palms can be quite delicate, and to prevent them from snapping, attach two splits to the trunk on opposite sides, securing the leaf bundle in place.
Never, and I mean never, nail anything directly onto the trunk. Unlike broadleaf trees, palms lack the ability to heal themselves when their trunks are injured.
Even minor scratches or scrapes on the trunk could make the palm susceptible to insects and fungus. Before fastening chains, ropes, or cables to the trunk, wrap it with nylon slings.
Don’t forget to wrap the roots with wet burlap to ensure they stay moist during transit. If you’re using a pickup truck for transportation, make sure to encase the entire palm in a damp tarp.
This not only shields the roots, bark, and fronds from damage but also prevents the roots from drying out due to the wind during the journey.
5. Preparing the Planting Site
Dig a hole that’s twice the diameter of the root ball. Given that palms thrive with good drainage, it’s crucial to test the soil before planting. Fill the hole with water and give it an hour.
Then fill it again and observe how long it takes for the water to go away. If it drains within a few hours, you’ve got excellent drainage. If it takes days, there’s a problem.
To enhance drainage, consider adding some sand to the mix. For clayey soil, combine three parts native soil with one part organic soil mix and one part coarse sand. If your soil is sandy, simply use three parts of your native soil with one part organic soil mix.
In addition to incorporating sand, you can place stones at the bottom of the planting hole, drill some holes in the base to loosen up the soil, or, in severe cases, install a drainage pipe to divert excess water away from the plant.
6. Planting the Palm
The key here is to get that palm in the ground as soon as you can. If there’s a delay, find a shady spot for it and keep those roots moist. A layer of mulch can help prevent them from drying out.
Now, when it comes to planting depth, the rule is to keep it at the same level it was at before. Planting too deep can lead to water stress and nutrient issues. On the flip side, planting it too high isn’t great either. Since the palm’s roots aren’t fully established yet, strong winds could topple it over.
Before you pop it into the hole, soak the soil with water. Position the tree in the hole, fill it halfway with your prepped soil mix, and then water it again before adding the rest of the soil. Be thorough to avoid any sneaky air pockets.
While you can go with your native soil for backfill, I like to mix it with some organic matter to give the plant better nutrients.
Recent research shows that if the backfill soil is too different from your native soil, the new roots may stick to the amended soil like it’s a container. However, amending about 25% of the soil should be just fine.
Once you’re done backfilling, create a soil barrier around the tree’s perimeter to hold the water in.
7. Watering Your Newly Planted Palm Tree
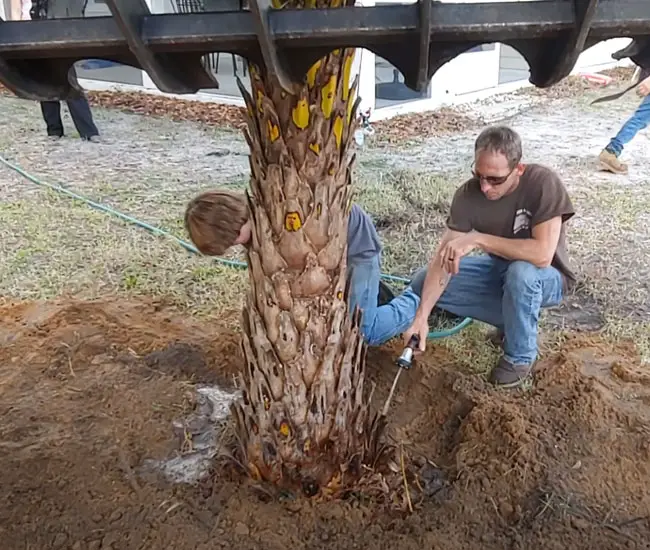
Now, here’s where things get interesting. Unlike container-grown palms, field-grown ones have had their roots trimmed during the transplant, so they’ve got a smaller root ball to slurp up water.
While they’re growing new roots, they need more water than those pampered container-grown pals whose roots haven’t been disturbed as much.
So, you’ll have to be generous with the water and do it more often until those new roots get their act together.
For the first three weeks, water your freshly planted palm every single day, and then every other day during the fourth week. If it’s the hot season when you’re planting, you might even need to water it twice a day for the first few weeks.
The most effective method is deep watering; simply leave a water hose to slowly drip for 20 minutes to ensure the soil around the root ball remains moist.
The deep watering method works the best. Leave a water hose with slowly dripping water for 20 min to make sure the soil around the root ball is moist. Remember, the soil takes its sweet time to drink up water. After around six weeks, you can cut back on the watering and switch to the regular schedule.
8. Adding Mulch
To retain moisture and keep pesky weeds at bay, use mulch around a palm’s base. As the mulch breaks down over time, it enriches the soil with organic goodness. Apply about 2 inches of mulch, making it thinner near the trunk and thicker over the root zone.
But remember, too much mulch piled against the trunk can spell trouble. It may invite fungal diseases, lead to trunk rot, and hinder water from reaching the roots. Keep the mulch at least 1 foot away from the trunk of smaller palms and around 2 feet away from larger ones.
Choosing mulch over a lawn is the smarter move when it comes to ground cover. Lawns tend to be greedy, snatching up all the nutrients and moisture that your palm would love to have.
Plus, lawns create a maintenance problem when they need trimming close to the trunk. If you do need to trim the law near the palm, avoid using a string trimmer, as those strings can cut right through and cause lasting damage to the trunk.
9. Untying Leaves
There’s quite a debate on this topic. Many gardeners think that keeping the leaves tied up for a few weeks after transplanting can reduce water loss and prevent the palm from swaying too much in the wind.
However, recent research suggests that keeping the leaves bound doesn’t really boost growth; instead, it might create a cozy environment for plant diseases to thrive.
My strong recommendation: go ahead and untie those palm fronds right after planting.
10. Providing Support
Container-grown palms generally stand tall without needing any support because their root balls are substantial enough to keep them upright. However, field-grown palms, with their smaller root balls compared to their height, require a helping hand.
To prevent your freshly planted palms from taking a tumble during windy episodes, give them some support using timber.
But here’s the golden rule: NEVER drive nails directly into the trunk. Instead, wrap the trunk with burlap before attaching four short lengths of lumber using metal bands or a similar tie. This ensures the wood stays securely in place without harming the trunk.
Next, nail four or five support timbers into these pieces. Keep the supports in place for a year or until the palm has grown enough roots to stand on its own.
12. Fertilization
Hold off on the fertilizer until you spot new growth. You might come across articles on the internet advising you to apply fertilizer right after transplanting a palm, but truth be told, there’s no rush until the palm develops a new root system.
Wait about two months, and then go ahead and apply a good-quality slow-release fertilizer.
13. Dealing with Transplant Shock
If your transplanted palm tree seems like it’s dying, it’s likely experiencing what we call “transplant shock.” Signs include brown and yellow leaves with dry tips. Unfortunately, there isn’t much you can do at this point. The palm needs time to acclimate to its new surroundings and grow fresh roots.
This adjustment period might take up to four months, so patience is key. Sometimes, palms shed most of their leaves in the first year after transplanting. Also, don’t expect a significant amount of new growth during the first year.
Generally, it takes a palm about three full growing seasons to become fully established in its new location. So, hang in there!
When is the Best Time to Transplant a Palm Tree?
If you live in a tropical climate, the good news is that you can transplant your palm tree pretty much any time of the year.
However, the best time for this operation is during spring or early summer when the weather is warm. This gives your palm ample opportunity to establish itself and sprout fresh roots.
Avoid the notion of moving palm trees during drought spells. Palms already lose a considerable chunk of their roots during transplantation, and dealing with drought stress on top of that is quite the challenge.
Also, keep in mind that root growth takes a significant hit when the soil temperature drops below 65°F.
Can You Sell a Mature Palm Tree?
Now, when it comes to relocating, many homeowners contemplate selling their towering palm trees that have graced their backyards for years.
Here’s the snag with large palms, like the majestic 20-footers: they demand a whole lot of manpower and heavy equipment to be uprooted and transported. What’s more, the larger the palm, the slimmer its chances of surviving the move.
In the grand scheme of things, if you have to shell out money for equipment and transportation to relocate the palm, it might just be more straightforward and cost-effective to purchase a fresh, container-grown palm from your local nursery.
However, if you happen to possess a rare palm that’s hard to come by, many nurseries would probably be thrilled to take it off your hands.
Related articles:
–Transplanting Palm Tree to a Bigger Container
–How To Plant A Palm Tree In 10 Easy Steps (with Pictures)
–Top 10 Palm Tree Planting Mistakes You Don’t Want To Make
–Transplanting Palm Tree from a Container into the Ground
Hello, I had a Sable palmetto tree that was planted in 89 after Hurricane Hugo. The old lady across the street decided to cut half the palms out of it (green and brown) so she could have a better view of the ocean. It took the tree 25 years to look the way it did so my question is how long will it take to grow back and will it survive?
Hi,my name is Johannes.I am a landscaper and my client got 6palms that she needs to plant in her house.apparently this palms are +-20meters tall.
Hi Katrin, your article on moving palms is very informative – we have quite a tall coconut palm we’d like taken out, do you know if nurseries would pay us or charge us?!
I like the point you made about waiting to fertilize the palm tree. I’m surprised that it take so long for the new root system to be ready, however. How much risk is there of the plant dying during the transplant shock interval? I’m wondering if I should just plant a new palm tree at my new place, or save the old one.
I transplanted some palms I have watered them every day but they look brown. Are they dead? They have some pale green in the middle of the main leaves
I have some palms in a nusery and at a home would like to transport and plant them . What would it cost?
Is it true you should leave water running at a trickle for a few weeks after transplanting a mid size Bismark Palm?
We have purchased 6000 datepalm trees from Dubai and shifting them to Karachi Pakistan now. I don’t know the name of variety. These plants are reaching Pakistan in partial consignments. The supplier is packing trees in containers which took one month to reach Pakistan.
Please guide me what measures we should take immediately to avoid tree damage and what measures we should take while their shifting in the soil. Also guide me about soil mix in the pit of tree, fertilizer and water requirement. Also let me know if any type of fungicide, pesticide or root growth hormone application is required.
Best regards,
Thanks a lot for such good advice.
I had 2 Sabah palms planted and although it takes time to get new growth, it is nearly 8 months since they were planted. They appear to be dead. When should I give up on these palms.
Good article. Very informative and simply explained! Thanks!
I have a approx 15m coconut palm that came down in a storm last night. It’s a huge beauty, can I re dig the hole and replant it? I’m loathed to have it chopped up and taken away.